
руководство Citizen CL-S321
Руководство для Citizen CL-S321 на английский. Это руководство в формате PDF состоит из 40 страниц.
Смотреть руководство для Citizen CL-S321 ниже. Все руководства на ManualsCat.com могут просматриваться абсолютно бесплатно. Нажав кнопку «Выбор языка» вы можете изменить язык руководства, которое хотите просмотреть.

Описание Citizen CL S321
- Технология термопереноса
- Разрешение печати макс. — 203 dpi
- Скорость печати принтера макс. — 100 мм/сек
- Ширина печати макс. — 108 мм
- Ширина этикетки макс. — 118 мм
- Длина риббона макс. — 110 м
- Интерфейс — USB 2.0, RS-232, Ethernet
- Корпус — Hi-Open
Интерфейсы
- USB
- LAN ETHERNET
Драйверы и системы комманд
- Розница
- Здравоохранение
- Аптеки
- Интернет торговля
- Средние и малые предприятия
Термотрансферный принтер начального уровня
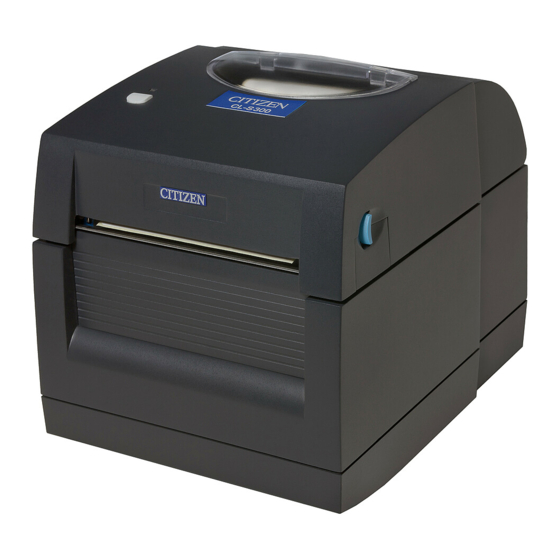
Citizen CL-S321 простой и понятный термотрансферный принтер начального класса для печати на обычных этикетках и на термоэтикетках. Принтер отличает низкая стоимость, поддержка языка EPL2, а также наличие трех встроенных интерфейсов. Принтер CL S321 поддерживается драверами от Seagull Scientific и комплектуется программой дизайна этикеток Bartender
Citizen CL-S321 принтер
Термотрансферный принтер этикеток Citizen CL-S321 снят с производства.
На смену ему появился принтер Citizen CL-E321
Термотрансферный принтер Citizen CL-S321 с шириной печати этикеток до 11,2 см разработан специально для сферы логистики, требовательной к простоте эксплуатации и заинтересованной в снижении издержек на печать этикеток. Однако компактные размеры устройства, а также поддержка стандартных языков программирования EPL2 позволяет интегрировать этот принтер практически в любое существующее приложение, вне зависимости от сферы деятельности компании: розничная торговля, здравоохранение и пр.
Настольный принтер этикеток Citizen CL-S321 подходит для работы из-под приложений Windows®. Набор стандартных интерфейсов включает в себя порты Ethernet, RS-232 и USB.
Особенности принтера Citizen CL-S321
- Термотрансферная печать
- Скорость печати до 100 мм в секунду
- Легкая смена расходных материалов
- Управление всего одной клавишей
- Передняя панель предотвращает повреждение печатающего устройства от влаги или механических ударов
- Регулируемая ширина печатного материала: от 25,4 до 118 мм
- Намотка риббона до 110 м
- Три интерфейса сразу: USB 2.0, RS-232 и 10/100 Ethernet
- Компактные размеры, благодаря встроенному блоку питания
Сфера применения принтера Citizen CL-S321
- логистика
- розничная торговля
- здравоохранение
Характеристики принтера Citizen CL-S321
Quick Links
View a manual of the Citizen CL-E300 below. All manuals on ManualsCat.com can be viewed completely free of charge. By using the ‘Select a language’ button, you can choose the language of the manual you want to view.
Page
4 —
—
Radio Wave Interference Self-Regulation
This is a class B device.
Although this device is designed for home use, use in close proximity to radios or
television antennas could cause interference.
Use the device correctly in accordance with the instruction manuals.
VCCI-B
GENERAL PRECAUTIONS
Before using this product, be sure to read through this manual. After having read
this manual, keep it in a safe, readily accessible place for future reference.
The information contained herein is subject to change without prior notice.
Reproduction or transfer of part or all of this document in any means is prohib-
ited without permission from Citizen Systems.
Note that Citizen Systems is not responsible for any operation results regardless
of omissions, errors, or misprints in this manual.
Note that Citizen Systems is not responsible for any trouble caused as a result
of using options or consumables that are not specified in this manual.
Except explained elsewhere in this manual, do not attempt to service, disas-
semble, or repair this product.
Citizen Systems Japan Co., Ltd. shall not be liable for damages caused by im-
proper or incorrect usage or by the usage environment.
Data is basically for temporary use and not stored for an extended period of time
or permanently. Please note that Citizen Systems is not responsible for damage
or lost profit resulting from the loss of data caused by accidents, repairs, tests or
other occurrences.
If you find omissions, errors, or have questions, please contact your Citizen
Systems dealer.
8 —
—
General Precautions
Observe these precautions to ensure proper use of the device. Make sure to
read these precautions.
CAUTION
Do not touch the area around the thermal head during or right after the printing
process. This area will be hot and may cause burns.
Do not drop or insert small objects such as clips or pins into the printer. Doing so
may result in failure.
Exercise caution when carrying or transporting the device. Dropping the device
may damage other objects or cause injury.
Make sure to open the printer cover fully when it needs to be opened. Failure to
do so may result in the printer closing unexpectedly, which may cause injury.
Exercise caution when the printer cover is open. Contact with edges may result
in injury.
Do not open the printer cover while the printer is printing.
Do not use thinner, trichlene, benzene, ketone-based solvents, or cleaning cloths
with chemicals to clean the case surface.
Do not use the device in environments exposed to significant levels of oil, metal
shavings, waste, and dust.
Do not spill liquids onto the device or expose the device to spray chemicals.
Do not step on, drop, hit, or otherwise subject the device to significant force or
impact.
Make sure to use the control panel correctly. Pressing buttons randomly may
cause malfunction and even failure. Do not use sharp objects including tips of
pens to operate the control panel.
If some abnormality occurs during use, immediately stop using the device and
disconnect the power plug from the electrical outlet.
Do not disassemble the device for repairs in case of failure. Always contact the
dealer for repairs.
The auto cutter has internal blades near the media discharge port. Never insert
hands inside the media discharge port whether the printer is operating or not.
9 —
—
Installation Precautions
CAUTION
Do not use or store the device in environments exposed to excessive heat,
moisture, direct sunlight, near heaters, extremely high or low altitudes, excessive
humidity, or excessive dust.
Do not use the device in environments, such as laboratories, where chemical
reactions occur.
Do not use the device in environments exposed to air that contains salt or toxic
gases.
Place printers on level, stable surfaces in environments with good ventilation. (Do
not place the printer such that the vents are against walls.)
Do not place objects on top of the device.
Using the device near radios or televisions or plugging the power cord into the
same electrical outlet as used by such devices may cause reception interfer-
ence.
Use the device in environments at specified power supply voltage and frequency.
Use only the included power cord. Do not use the included power cord with other
devices.
Do not place objects or step on power cords.
Do not pull or attempt to carry the device by the power cord or an interface cable.
Do not connect too many power cords to a single electrical outlet.
Do not bundle the power cord.
Hold the power cord by the power plug to connect and disconnect to/from electri-
cal outlets.
Ensure connectors are properly connected. In particular, reversing the polarity
may damage internal parts.
Turn the power switch off before connecting or disconnecting interface cables.
Do not run long signal lines or make connections with noisy devices to the extent
possible. If necessary, use shielded twisted pair cables for signal lines and take
any other necessary steps to ensure signal integrity.
Place the device near an electrical outlet and ensure that the power plug can be
unplugged easily so that the power to the device can be cut quickly if necessary.
Use electrical outlets with ground terminal screws. Using electrical outlets without
ground terminals may result in injury due to static electricity.
17 —
—
2. Part Names and Function
2.1 Front of Printer
CL-E300X***N (standard type)
①
④
②
③
④
CL-E300X***NS (with AC adapter case)
⑥
19 —
—
4. Cover release buttons
The cover is opened by pressing the buttons on both the right and left sides.
5. Push marks
6. AC adapter case
7. Cutter
2.2 Operation panel
①
②
③
The operation panel includes 2 LEDs and 1 key.
1. Power LED
Turns on when the power is turned on and turns off when the power is turned off.
2. Status LED
Turns on or flashes in green, red, and amber depending on the printer status.
Color Lights/
flashes
Status
Green On Printer is online
Flashes Receiving data
Amber On Startup
Red to green to amber Flashes Error or alarm
— Off Paused
3. FEED key
Feeds media when pressed while the printer is waiting to receive data.
Pressing and holding this key for at least 3 seconds changes the operation
mode to the online configuration mode.
Refer to 9. Online Configuration Mode
21 —
—
CL-E300X***BC (with integrated cutter)
⑧
1. External media feed port
This port is used to feed media into the printer.
2. Power switch
Turns the printer power supply on and off.
3. DC jack
Connects to the included AC adapter.
4. D-SUB 9pin serial interface
5. USB interface
6. Ethernet Interface
7. AC port
8. Ethernet panel button
This button prints and initializes network settings.
CAUTION
Do not connect a USB cable to the Ethernet interface. Doing so may damage connectors/inter-
faces.
22 —
—
2.4 Inside of Printer
CL-E300X***N (standard type)
①
②
③
⑩
④
⑤
⑦
⑪
⑪
⑧
⑨
⑥
23 —
—
CL-E300X***BC (with integrated cutter)
CL-E300X***PC (with interchangeable cutter)
⑫
⑬
⑫
1. Thermal head
Prints characters and graphic data on paper (paper rolls).
2. Upper sensor
This sensor detects the media position.
3. Media damper
When using roll media, absorbs tension generated by media feed operations to
prevent print errors.
4. Bottom sensor
This sensor detects the media position.
5. Fixed left-side media guide
6. Adjustable right-side media guide
7. Platen roller
This roller transports media.
8. Media shaft
9. Media shaft guide
10.Head balance adjustment slider
11.Manual cutter (Upper/Bottom)
12.Cutter
13.Media discharge port
26 —
—
3. Set the media so that the media shaft guide is on the right side of the media when
looking at the front of the printer.
4. Press the media shaft guide onto the media roll so that the center of the media aligns
with the center of the media shaft and then set the media into the printer.
1. Assemble the media shaft and media shaft guide.
2. Insert the media shaft through the core of the media roll and then set the assembly into
the printer.
27 —
—
If using a model with the integrated fixed blade/adjustable blade type of cutter (CL-
E300X***BC), insert the media through the cutter slit.
Media insertion slot
Media
28 —
—
5. Make sure the media is in abutment with the left media guide and then adjust the posi-
tion of the right media guide in accordance with the media width.
6. Slide the head balance adjustment slider located near the thermal head along the me-
dia size scale (inches) so that the position of the notch in the slider matches the media
width.
2’ 3’ 4’ 4.65’
1’
Head balance adjustment slider
media size scale Thermal printhead
32 —
—
Transmissive Sensor Adjustment
CAUTION
The bottom sensor and upper sensor must be in alignment with each other.
Adjust the position of the bottom sensor and upper sensor in accordance with the
media width.
Move the bottom sensor and upper sensor by the same number of steps from the position of
the triangle ().
variable range
Upper sensor
variable range
Bottom sensor
The range of bottom sensor and upper sensor horizontal adjustment is 10 steps between the
triangle marks ().
Reflective Sensor Adjustment
Adjust the sensor position so that the light-emitting unit of the bottom sensor is posi-
tioned at the center of the black line on media.
Media (Face side)
Black mark
(Reverse side)
3.4 Connecting the AC Adapter
CAUTION
Use the dedicated AC adapter designed for this device.
Make sure the power switch on the printer is turned off before connecting the AC adapter.
Insert the AC adapter connector completely into the DC jack.
33 —
—
1. Insert the DC plug on the output side of the AC adapter into the DC jack in the printer.
2. Insert the plug of the AC cord into an electrical outlet.
AC Adapter
Models with the AC adapter case
Insert the plug of the AC cord into the AC port.
36 —
—
4. Basic Operation
Press the “○” side of power switch on the back of the printer.
Power switch
The power LED on the operation panel turns green after the power is turned on.
CAUTION
Stop printer operation before turning off the power.
4.1 FEED Key Operation
Online state (status LED is solid green)
(1) Press the FEED key while the printer is not receiving data to feed media.
If label media is specified, the printer automatically stops after detecting the
beginning of media. If continuous media is specified, the printer stops after a
certain amount of feed operation.
If Tear off mode is selected in the Function Select setting, the printer feeds me-
dia to the tear-off position.
For models with a cutter, the printer will feed media to the cut position and then
cut the media.
(2) Press and hold the FEED key for at least 3 seconds while the printer is not receiv-
ing data to change the operation mode to the online configuration mode.
Refer to 9. Online Configuration Mode
37 —
—
Printing (status LED is solid or flashing in green)
Press the FEED key while the printer is printing or receiving data to pause the printer.
The status LED turns off, and the printer pauses.
If the FEED key is pressed while the printer is printing, the printer will finish printing
the current label and then stop.
Press the FEED key again to resume printing operation for the remaining labels in
the print job.
Paused (status LED is off)
Press and hold the FEED key to change to the clear job mode.
Refer to 10. Clearing Jobs Stored in the Printer
Error/alarm has occurred (status LED flashes in sequence of red to green to
amber)
Press the FEED key to clear the error or alarm.
40 —
—
Home menu Sub menu Default Configurable range Notes
System Setup — 1 Sensor Monitor — — Displays the detection level of the
currently selected sensor
Sensor Level 1.7 V 0.0 V — 3.3 V Sets the sensor threshold
Paper End Level 3.00 V 0.01 V — 3.00 V Sets the paper end level
Error Reporting On Printing On Printing
Immediate
Error reporting setting
Buzzer Select Exec/Err Exec/Err
All
Error
Key
None
Sets the conditions at which the
buzzer is triggered
Metric/Inch Inch Inch
mm
Sets the unit of measure
Max Media
Length
10.00 inch
254.0 mm
CL-E300:
1.00 — 99.99 inch
25.4 — 2,539.7 mm
CL-E303:
1.00 — 50.00 inch
25.4 — 1,270.0 mm
Sets the maximum length of label
media
Home menu Sub menu Default Configurable range Notes
System Setup — 2 Settings Lock Off On
Off
Prevents changes via setting com-
mands
Keyboard Lock Off On
Off
Prevents changes via key operation
Control Code STD STD
ALT
ALT-2
Changes the command mode for
DMX mode (only when Datamax®
emulation is selected)
Media Power Up Off On
Off
Sets the media length measuring
function when the power is turned
on (only when Zebra® emulation
mode is selected on international
models)
CI Lock Off On
Off
Prevents changes via CI com-
mands (only when Zebra® emula-
tion mode is selected on interna-
tional models)
Emulation Select DM4
(Datamax®)
ZPI2 (Zebra®)
DM4
DMI
DPP
ZPI2
EPL2 (future release)
Datamax®/Zebra® compatibility
selection
DM4 Datamax® 400
DMI Datamax® IClassTM
DPP Datamax® Prodigy Plus®
ZPI2 Zebra® ZPL2 ®
EPL2 Zebra ® EPL2TM (future
release)
Emulation Auto
Detect
Full Auto On
Off
Full Auto
Sets the emulation sensing function
(international models only)
42 —
—
Home menu Sub menu Default Configurable range Notes
After Print — 2 Paper Position 0.00 inches
0.00 mm
STD
0.00 — 2.00 inch
0.0 — 50.8 mm
Cut/Tear
-1.00 — 1.00 inches
-25.4 — 25.4 mm
Adjusts the stop position.
This setting is dependent on the
Metric/Inch setting.
Each device has an initial stop
position as configured with the
settings previously described. This
setting sets a relative value from
these other settings.
Feed Key Action Feeds Media Repeat Last Set
Repeat Last One
Feeds Media
Changes the operation of the Feed
key
Repeat Last Set
Reprints a set of labels.
This setting is ignored when Ze-
bra®* emulation mode is selected.
Repeat Last One
Reprints the last page only.
Prints only 1 sheet/label from the
current number when using counts.
Feeds Media
Functions as the FEED key.
Disables reprinting.
43 —
—
Home menu Sub menu Default Configurable range Notes
Interface RS-232C Baud
Rate
9600 115200
57600
38400
19200
9600
4800
2400
Sets the baud rate of the serial
interface
RS-232C Parity None None
Odd
Even
Sets the communication parity of
the serial interface
RS-232C
Length
8 bits 8 bits
7 bits
Sets the data length for the serial
interface
RS-232C Stop
bit
1 bit 1 bit
2 bits
Sets the stop bits for the serial
interface
RS-232C X-ON Yes Yes
No
Enables/disables X-ON flow control
for the serial interface
USB Device
Class
Printer Printer
VCOM
Sets the USB device class
USB VCOM
Protocol
Auto Auto
DTR
X-ON
Sets the USB VCOM protocol (flow
control)
IPv4 Address 169.254.001.010 000.000.000.000 —
255.255.255.255
Sets the IPv4 network address
IPv4 Subnet
Mask
255.255.000.000 000.000.000.000 —
255.255.255.255
Sets the IPv4 subnet mask
IPv4 Gateway 000.000.000.000 000.000.000.000 —
255.255.255.255
Sets the IPv4 gateway
IPv4 DHCP On On
Off
Enables/disables IPv4 DHCP
IPv6 On On
Off
Enables/disables IPv6
У вас есть вопрос о Citizen CL-S321, но вы не можете найти ответ в пользовательском руководстве? Возможно, пользователи ManualsCat.com смогут помочь вам и ответят на ваш вопрос. Заполните форму ниже — и ваш вопрос будет отображаться под руководством для Citizen CL-S321. Пожалуйста, убедитесь, что вы опишите свои трудности с Citizen CL-S321 как можно более детально. Чем более детальным является ваш вопрос, тем более высоки шансы, что другой пользователь быстро ответит на него. Вам будет автоматически отправлено электронное письмо, чтобы проинформировать вас, когда кто-то из пользователей ответит на ваш вопрос.
проблема с переключением режима печати. Вошел в конфигурацию принтера через утилиту под паролем «1111» и нашел там режим сейчас в термотрансферном а надо в прямая термопечать. Выбираю, кликаю установить, выхожу вхожу в него в новь и опять стоит термотрансфер буть он неладен. Как можно принудительно перевести и сохранить настройку?
Не пропечатывает ленту,лента выходит пустой.
Citizen CL-S321 не печатает этикетки,проверочный тест при запуске отоброжается,печать не идет,индикатор не выдает ни каких ошибок,драйвер переустонавливал,отправленные на очередь печать висит.но печать не идет
Задать вопрос о Citizen CL-S321
Принтеры для этикеток
Сопутствующие товары Citizen CL-S321
По вопросам покупки, интеграции или сервиса принтера обращайтесь в отдел продаж компании КД НЭФ